Snapied’s spell checker feature makes it easy to quickly identify and correct any spelling errors in your text. Whether you’re writing a blog post, creating a social media post, or sending an email, Snapied’s spell checker can help ensure that your writing is free from errors.
Here’s a step-by-step guide to using the spell checker feature on Snapied:
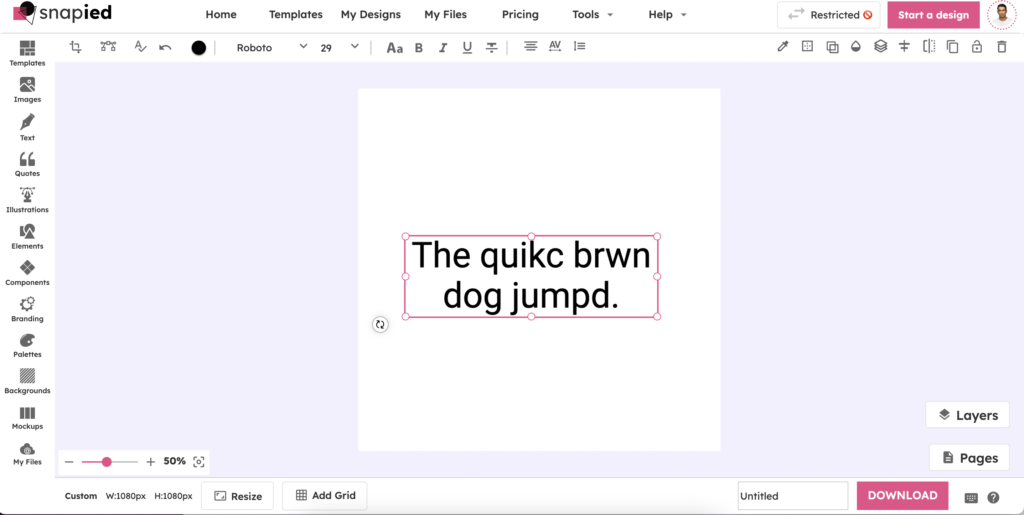
Step 1: Select the Text Field
To use Snapied’s spell checker feature, you’ll first need to select the text field where you want to check for spelling errors.
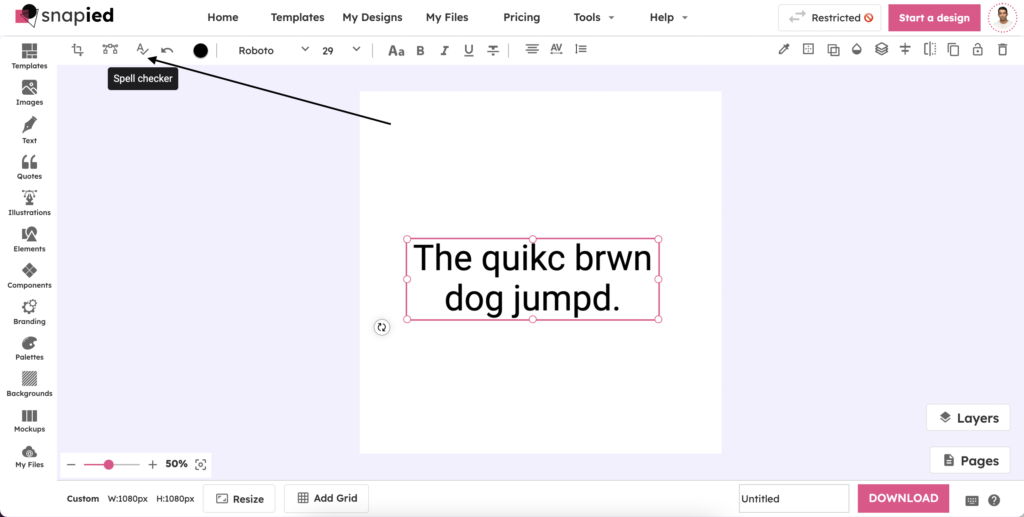
Step 2: Go to Spell Checker Icon
Once you’ve selected the text field, you’ll need to look for the spell checker icon on the header. The spell checker icon is typically represented by a small icon with a checkmark.
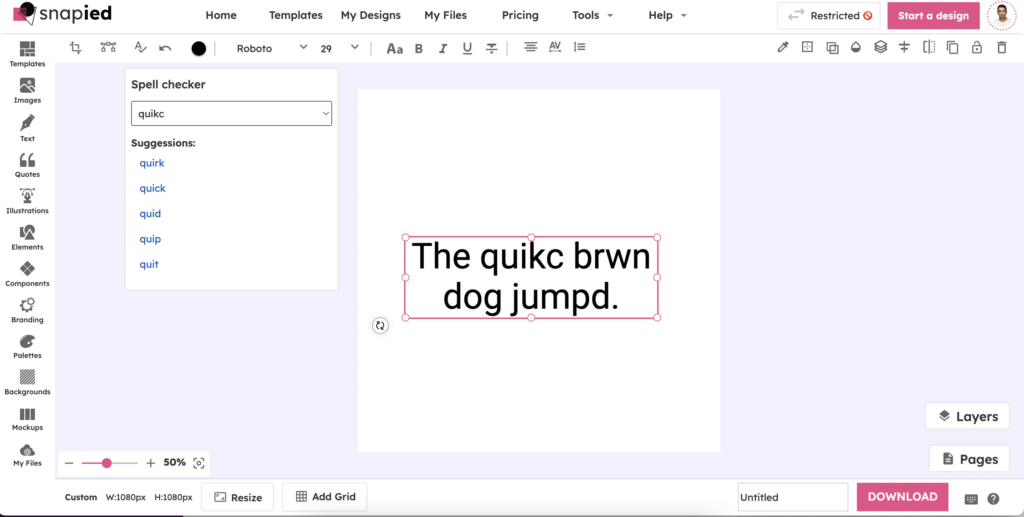
Step 3: Select the Incorrectly Spelled Word
Clicking on the spell checker icon will open a dropdown menu that displays a list of incorrectly spelled words in the selected text field. You can select the wrong spelled word from the dropdown menu by clicking on it.
Step 4: Select a Suggestion
After selecting the incorrectly spelled word, Snapied’s spell checker will provide you with a list of suggested corrections. You can choose the appropriate suggestion by clicking on it.
Step 5: Replace the Incorrect Word
Once you’ve selected the correct suggestion, Snapied’s spell checker will replace the incorrectly spelled word with the approved word. You can repeat this process for any other incorrectly spelled words in your text.
And that’s it! By following these simple steps, you can use Snapied’s spell checker feature to quickly identify and correct any spelling errors in your text. With this tool, you can feel confident that your writing is polished and error-free.
Snapied’s spell checker feature makes it easy to quickly identify and correct any spelling errors in your text. Whether you’re writing a blog post, creating a social media post, or sending an email, Snapied’s spell checker can help ensure that your writing is free from errors.
Here’s a step-by-step guide to using the spell checker feature on Snapied:
Step 1: Select the Text Field
To use Snapied’s spell checker feature, you’ll first need to select the text field where you want to check for spelling errors.
Step 2: Go to Spell Checker Icon
Once you’ve selected the text field, you’ll need to look for the spell checker icon on the header. The spell checker icon is typically represented by a small icon with a checkmark.
Step 3: Select the Incorrectly Spelled Word
Clicking on the spell checker icon will open a dropdown menu that displays a list of incorrectly spelled words in the selected text field. You can select the wrong spelled word from the dropdown menu by clicking on it.
Step 4: Select a Suggestion
After selecting the incorrectly spelled word, Snapied’s spell checker will provide you with a list of suggested corrections. You can choose the appropriate suggestion by clicking on it.
Step 5: Replace the Incorrect Word
Once you’ve selected the correct suggestion, Snapied’s spell checker will replace the incorrectly spelled word with the approved word. You can repeat this process for any other incorrectly spelled words in your text.
And that’s it! By following these simple steps, you can use Snapied’s spell checker feature to quickly identify and correct any spelling errors in your text. With this tool, you can feel confident that your writing is polished and error-free.