
Snapied’s design editor is embeddable. You have a website and you want to be able to design graphics everywhere. You need a graphic design editor that is white label, so it can be embedded into your website or platform
Getting started
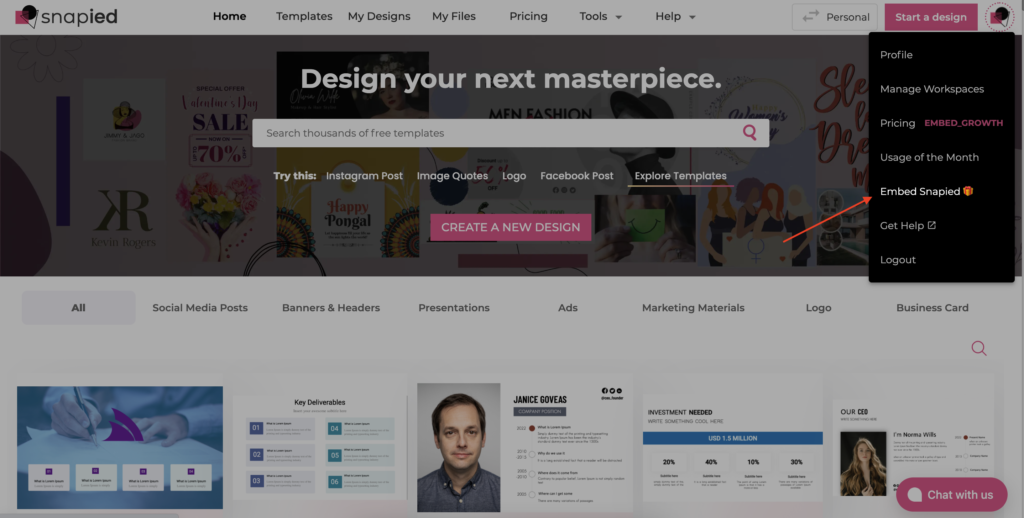
To open the embed Snapied configurations page click on “Embed Snapied 🎁” present in the avatar menu.
It will open the profile settings page, click on “Generate & Save API Key”.
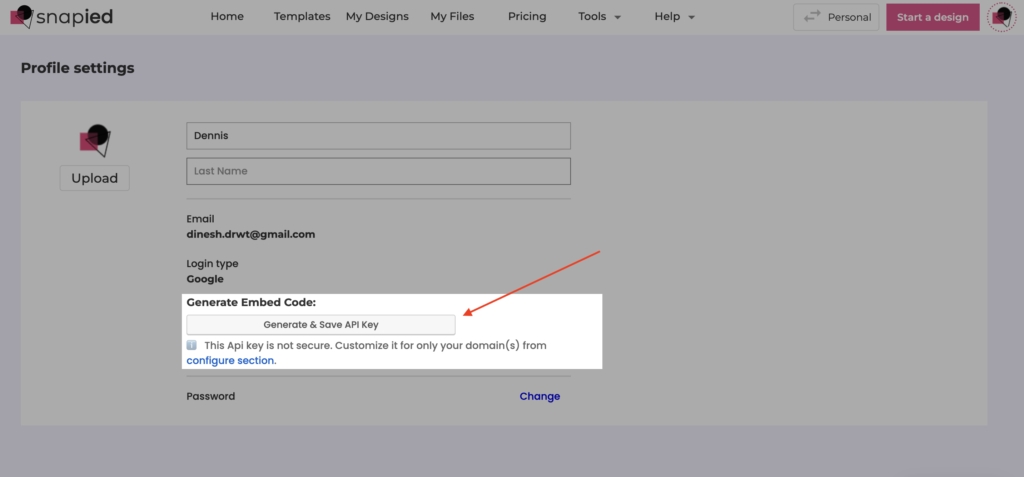
ℹ️ Regenerate your API keys periodically. You can regenerate the API key by clicking on the pointed button. Then, update your applications to use the newly-generated keys. Your old API Key will expired immediately.
This will generate 4 lines of code:
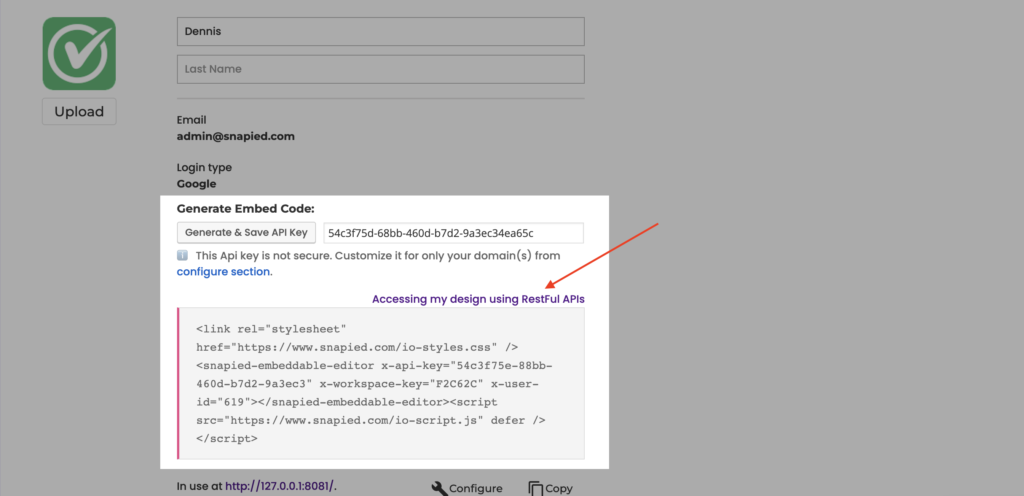
Sample code
<link rel="stylesheet" href="https://www.snapied.com/io-styles.css"/><snapied-embeddable-editor x-api-key="54c3f75e-88bb-460d-b7d2-9a3ec3" x-workspace-key="F2C62C" x-user-id="619"></snapied-embeddable-editor><script src="https://www.snapied.com/io-script.js" defer /></script>
API
| Name | Description | Required? | Sample |
|---|---|---|---|
| x-api-key | An API key is a token that a client provides when making API calls. The API key should be along with the <snapied-embeddable-editor> tag. If you don’t provide it all APIs calls will fail to serve. | Yes | <snapied-embeddable-editor x-api-key=”54c3f75e-88bb-460d-b7d2-9a3ec3″ |
| x-workspace-key | Each workspace can be designed for a specific purpose and can contain its own assets, designs, and team members. x-workspace-key uniquely identifies the workspace. | Yes | <snapied-embeddable-editor x-workspace-key=”F2C62C” |
| x-user-id | An id that uniquely identifies the user creates a workspace. If not provided it takes the logged-in user (account for which the API key is generated). | No | <snapied-embeddable-editor x-user-id=”619″ |
UI Explanation
1: In use at
We obtain the website name where you embed the code for the first time. If you need to do this generate another API key and reconfigure the editor. HTTP://127.0.0.1:8081/ is the localhost of our development server.
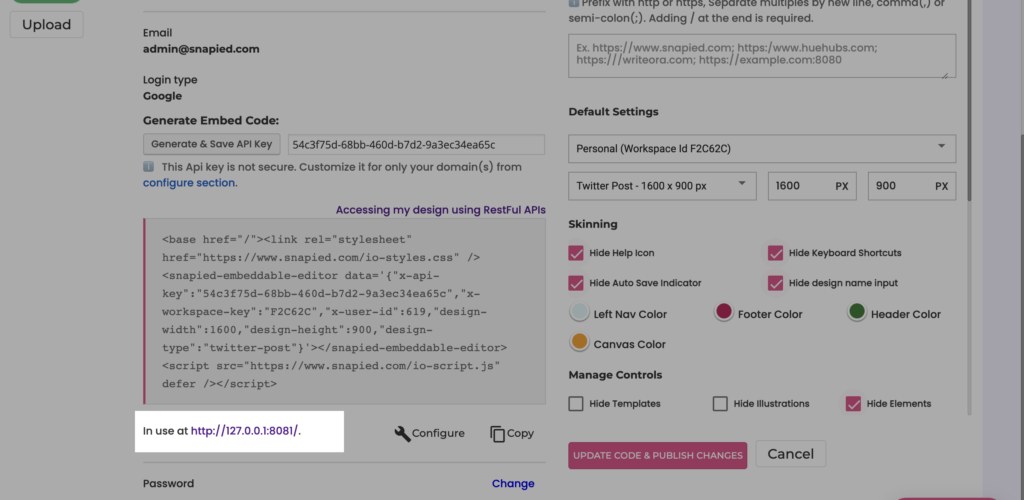
2: Configure
Click on the “Configure” button to customize the editor.
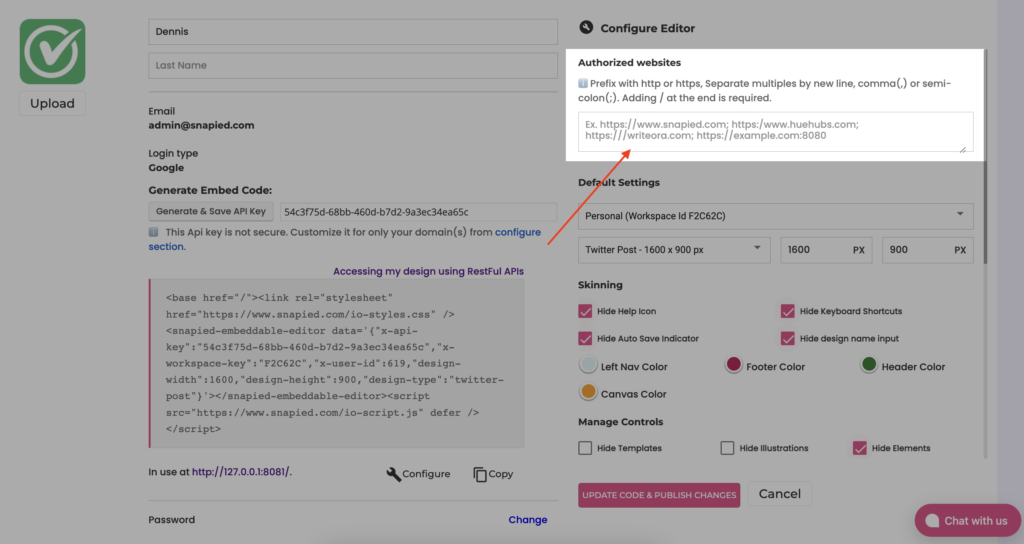
3: Authorized websites (Most important step)
Lists all domains authorized to execute to open the Snapied editor. Technically, it’s the website referer. Make sure the referrers, you mention are correct. You can separate multiple URLs by comma, semi-colon, or enter.
Note: Prefix with http or https, Separate multiples by a new line, comma(,) or semi-colon(;). Adding / at the end is required.
Example: https://embed.ideaonce.com/;https://writeora.com/;https://www-writeora-com.filesusr.com/;https://embed.snapied.com/;http://127.0.0.1:8080/
4: Default Settings
Field 1: All the created designs will be saved in the selected workspace. By default, it’s the first workspace in the list, but you can change it.
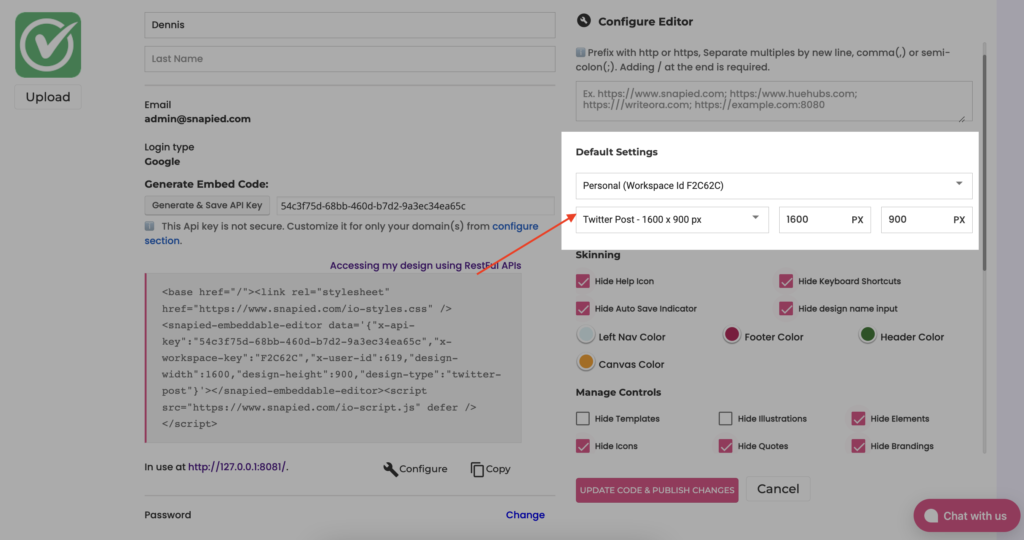
Field 2: The default canvas size. In the above image the we are setting twitter post (1600px X 900px) as the default canvas size.
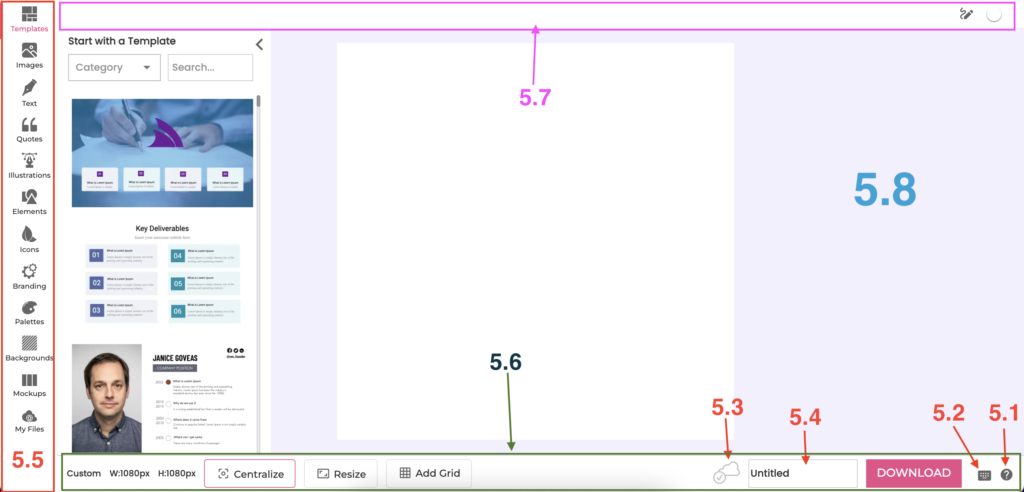
5: Skinning

5.1: Hide the help icon
Hides the help control in the embedded editor
5.2: Hide Keyboard Shortcuts
Hides keyboard shortcut control from the embedded editor
5.3: Hide autosave indicator
Hides the cloud icon, which indicates the design is saving
5.4: Hide design name
Hides input field for updating the design file name. The default name is “untitled”.
5.5: Left nav color
Changes the background color of left-most navigation bar
5.6: Footer color
Changes the background color of the footer bar.
5.7: Header Color
Changes the background color of top-most navigation bar or header.
5.8: Canvas Color
Changes the background color of the canvas.
6: Manage Controls
6.1: Hide Templates
Hide the templates tab from the left navigation bar.
6.2: Hide Illustrations
Hide the illustrations tab by default
6.3: Hide Elements
Hide the elements tab by default
6.4: Hide Icons
Hide the icons tab by default
6.5: Hide Quotes
Hide the quotes tab by default
6.6: Hide Brandings
Hide the brandings tab by default
6.7: Hide Palettes
Hide the palettes tab by default
6.8: Hide Backgrounds
Hide the backgrounds tab by default
6.9: Hide My Files
Hide my files tab by default
6.10: Hide Grids
Hide the grid button from the footer bar.
6.11: Hide Resize
Hide the magic resize button from the footer toolbar, By hiding this users won’t be able to resize the design from one size to another size.
6.12: Hide Layers
Hide the layers button from the page right corner.
6.13: Hide Multiple Page
Hide the multiple pages button from the page right corner.
6.14: Hide Remove Bg
Hide remove bg button by default
6.15: Hide Mockups
Hide the mockups tab from the left navigation bar by default.
6.16: Hide Texts
Hide the text tab from the left navigation bar by default.
6.17: Hide Images
Hide the images tab from the left navigation bar by default.
6.18: No load Templates by default
When the editor loads, we open the templates tab by default. Marking this option as checked will not load the template by default.
7: Downloads & Drawing Tools
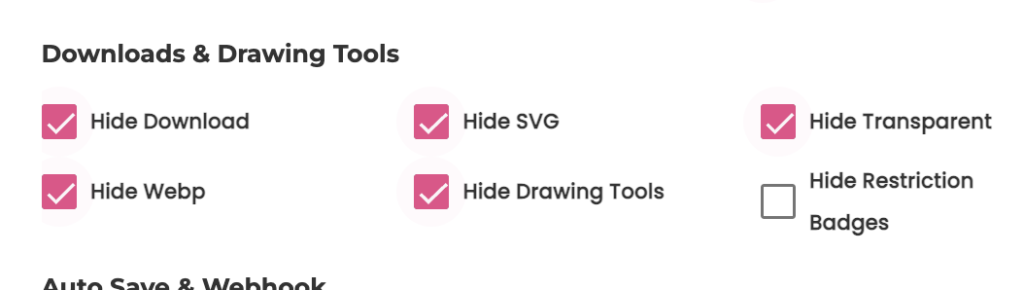
This feature allows you to control the download and drawing tool behavior.
7.1: Hide Download
Hide the download button from the footer toolbar.
7.2: Hide SVG
Hides the download SVG option from the download menu
7.3: Hide Transparent
Hides the transparent menu item from the download menu button.
7.4: Hide WebP
Hides the webp download item from the download menu button.
7.5: Hide drawing tools
This option hides the drawing tool from the header bar.
7.6 Hide restriction badges.
By default in the embedded editor, we show the badges over download and bg remove buttons that show the bg remove credits and total designs downloaded.
If you check this option, in the embedded editor you won’t see the badges. But the user will get the popup when the limits exhaust.
8: AutoSave & Webhook
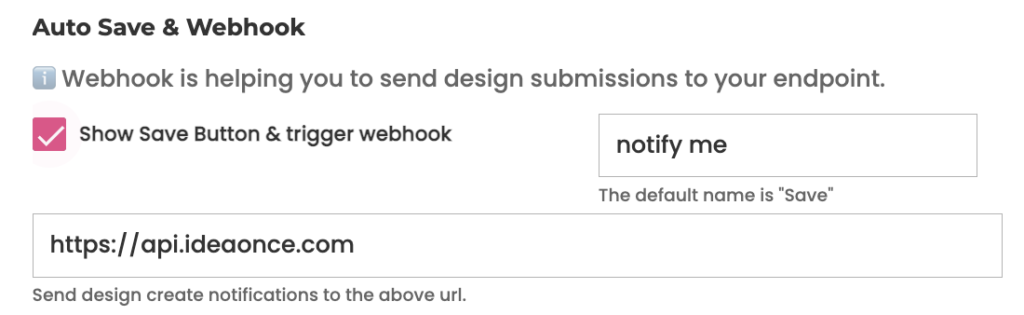
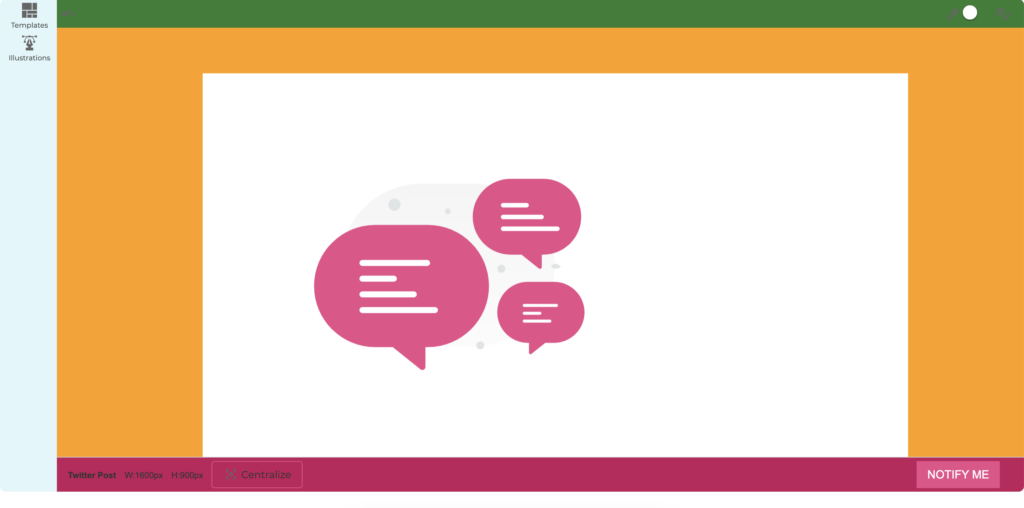
8.1: Button Name
By default the name is “Save” but you can rename it to anything you wish to make it.
8.2: Webhook URL
Webhook is helping you to send design submissions to your endpoint. You will be notified at the provided end-point with the below data:
{
	id: 1,
	name: "Design from snapied",
	platFormName: "twitter-post",
	previewImage: "https://cdn.snapied.com/ab_small.png",
	previewNormal: "https://cdn.snapied.com/normal.jpeg",
	previewNormalJpeg: "https://cdn.snapied.com/ab_normal.jpeg",
	previewNormalWebp: "https://cdn.snapied.com/ab_normal.webp",
	subTemplateId: 0,
	userId: "x101"
}
Note: This will send the notification to the provided webhook along with the above data when the user clicks on it.
Important Link:
Help Desk: https://help.snapied.com
Website: https://www.snapied.com
Embed Demo: https://embed.snapied.com
Developer: https://developer.snapied.com